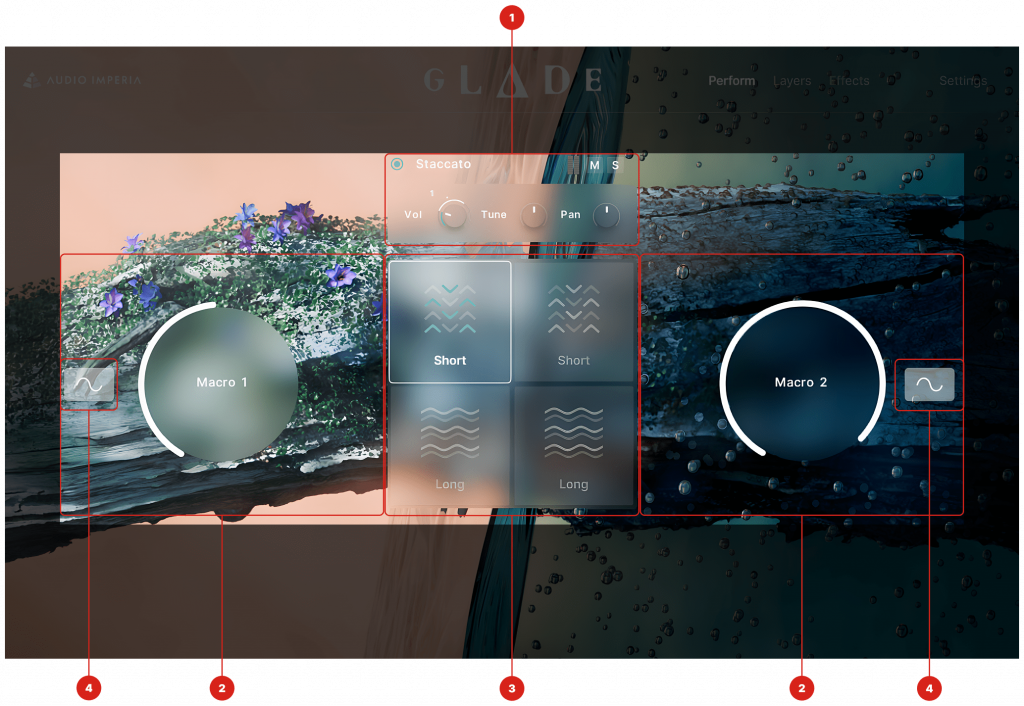
The Perform Page is the primary page of the instrument, displaying the most important controls for instrument playback. The most important area of the Perform Page are the central layer controls, consisting of the following elements:
Layer Controls: Here are your basic controls for each layer, including an on/off button, a Mute (mutes selected layer) and Solo (mutes all other layers) button, as well as knobs to control the volume, tuning and panning of your layer. Clicking the preset name brings up the Source Browser. Turning off a layer will unload its samples from memory.
Macro Control: At the heart of the designer engine are our Macro Controls. Almost all controls across the Designer Interface can be assigned to one of these two macros and then manipulated all at once, either manually as you play (via mouse or CC), or via an LFO (see Point 4). Refer to the Macro Modulation page for more info.
Layer Selector: Available on the the Perform, Layers and Effects page, the layer selector allows you to quickly cycle through each of the four layers of the instrument, as well as display the technique currently used in the selected layer. Each technique is represented with a different symbol and your selected layer is outlined with a white stroke. Selecting a layer will show all the controls relevant to that particular to that layer, such as any applied effects and controls.
LFO Panel: Clicking this panel brings up the LFO controls for each Macro.
Additional Controls
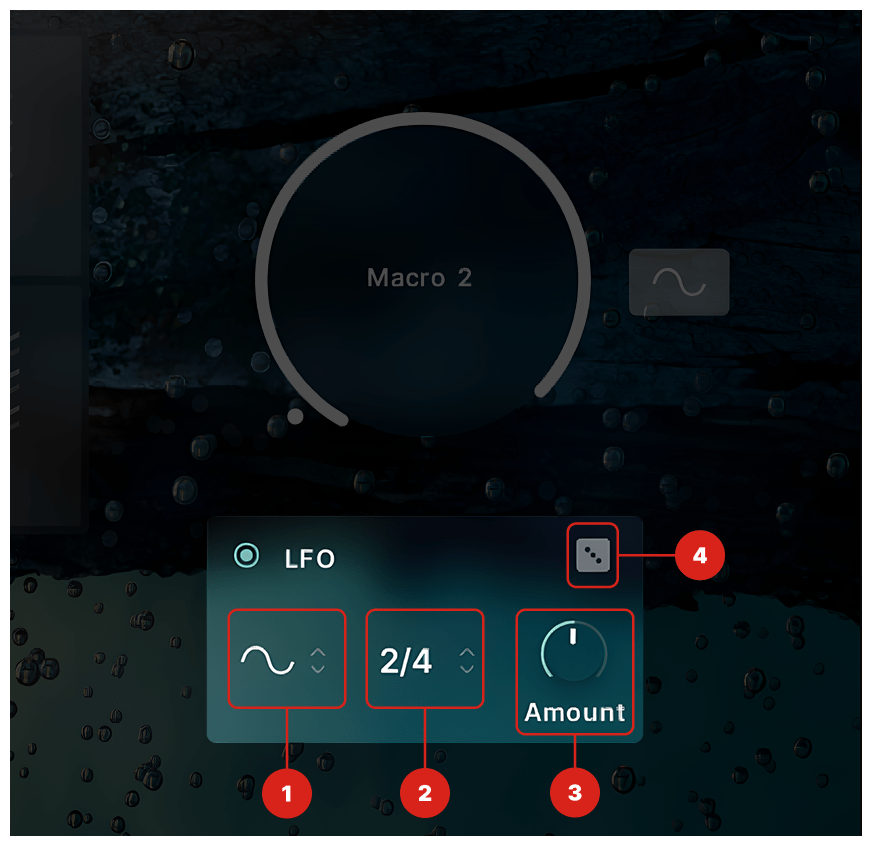
LFO Panel
Each Macro can be controlled via an LFO. The LFO Panel contains the following elements:
Shape: Choose from either a Sine, Sawtooth or Reverse Sawtooth LFO wave.
Time: Adjust how long it takes for your LFO to make a full cycle. This is tempo synced to your host BPM.
Amount: Adjusts the maximum value of a macro when it is controlled via an LFO.
Randomize: Click to randomise your LFO Shape, Time and Amount values.
Footer Controls
Dynamic Controls – Use Modulation and Expression to adjust your instrument. When a long/legato/percussion roll/sustained articulation is utilised in one of your layers, the dynamics control crossfades between the different recorded dynamic layers. Expression will adjust the overall volume of all layers before the effects chain.
Assign Button – Clicking the Assign button shows which controls can be assigned to either of the two macros, as indicated by a small “+” above each control. Refer to Macro Modulation for more information.
Master Volume – Adjust the output level of the signal after the effects chain.