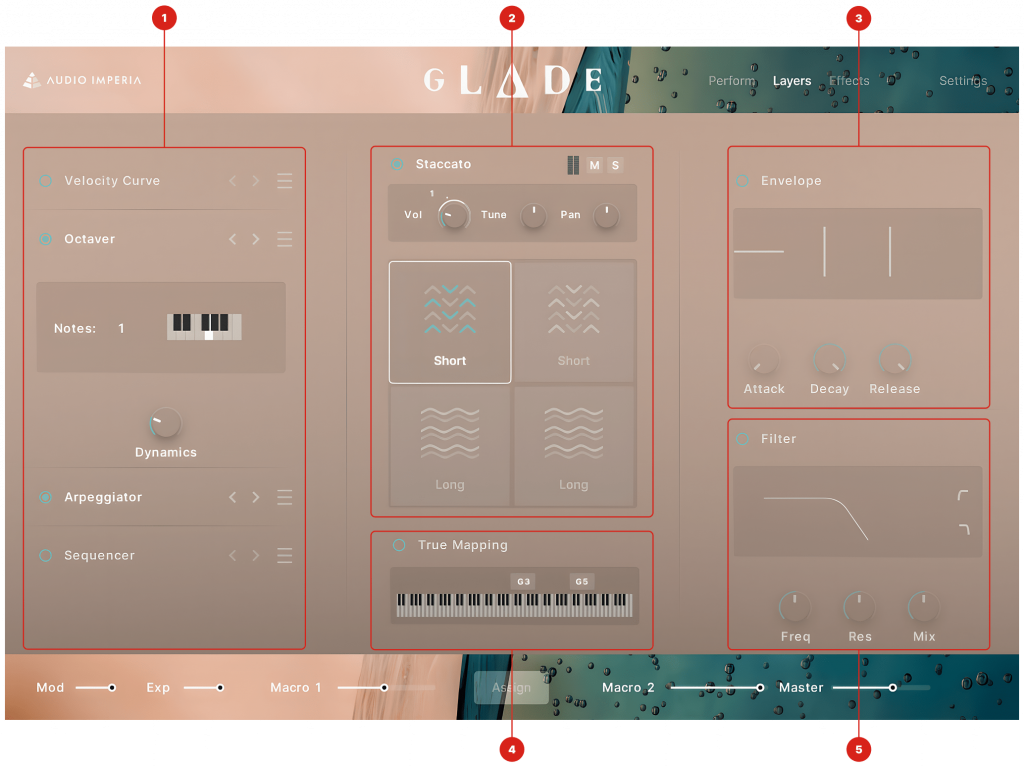
The Layers page allows you to adjust and refine each of your four layers. Controls are split into envelope / filter controls on the right hand side and technique specific layer effects for you to further dial in your sound on the left. When opening the layers page, you are met with the following elements:
Technique Specific Layer Controls – Here, controls applicable to the sound source type of your selected layer are shown. These adjust dynamically when a new sound source or snapshot is loaded.
Layer Controls / Layer Selector – Here you can select each of your four layers, as well as adjust basic controls for each layer.
Layer Envelope – Adjust the Attack, Decay, Sustain (for long / legato techniques), and Release of your layer.
True Mapping – Controls the true mapping for each layer.
Layer Filter – Here you can add either a high-pass or low-pass filter to your selected layer, with controls to dial in the frequency, mix and resonance of your filter.
Technique Specific Layer Controls
Below are a list of each of the layer controls available within Glade:
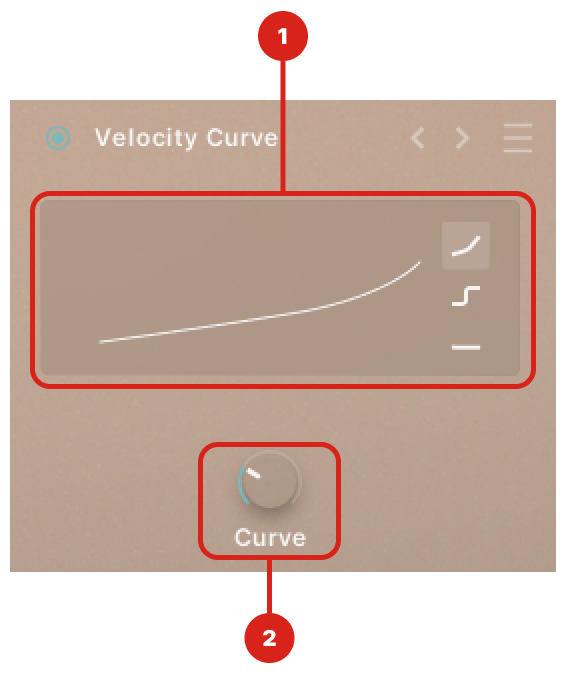
Velocity Curve
Velocity Curve Panel – Customise the layer’s response to your MIDI keyboard. Inputted velocities will be adjusted to fit the curve shown. Here you can see, select and and adjust your velocity curve types. Choose from either a Linear, Step, or Flat velocity curve.
Curve – Adjust your selected velocity curve.
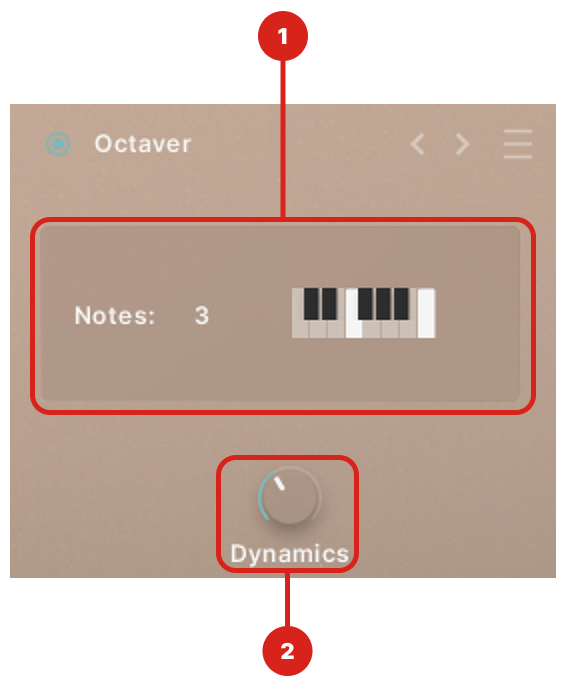
Octaver
Octaver Panel – The Octaver allows you to add a specific interval to be triggered automatically when a note is triggered on your keyboard. This allows you to create patches that are great for soaring melodies or enhanced short strings in different voicings instead of a primarily monophonic way to interact with the samples. The Octaver panel shows the additional notes you are able to add. Each added note will trigger alongside your pressed key. Click any key to activate / deactivate it.
The Octaver is C based, meaning any notes that are active on the Octaver keyboard display the degree of the scale added to your input. (e.g. this example adds a 4th and an Octave.)
Dynamics – Scales the volume of all notes added by the Octaver.
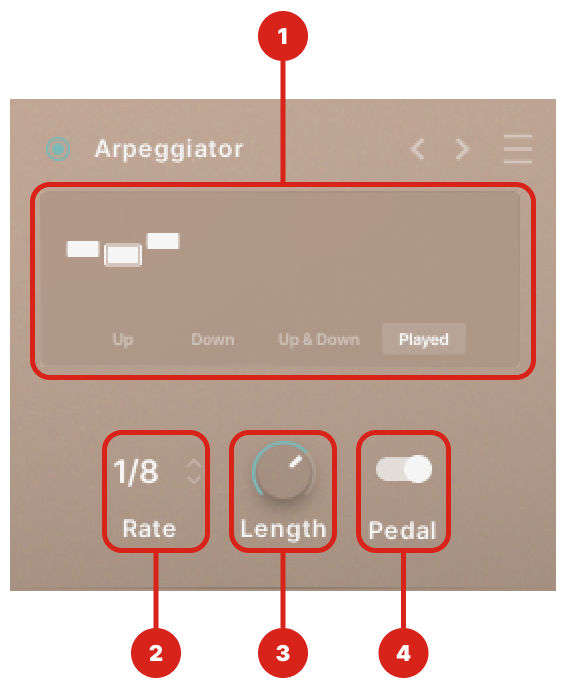
Arpeggiator
Arpeggiator Panel – Here you can see your chosen playing style. There are 4 to choose from: Up – This plays the notes from lowest to highest. Adding in new notes will change the sequence. Down – This plays the notes from highest to lowest. Adding in new notes will change the sequence. Up & Down – This plays the notes from highest to lowest and then back down to lowest. Adding in new notes will change the sequence. Played – This will play the notes back in the order you play them in. Adding in new notes will not change the sequence, and will add them at the end.
2. Rate – Adjust the playback rate of each note in your sequence. This is synced to your host BPM.
3. Length – Adjust the envelope length of each note in your sequence.
4. Pedal Toggle – When toggled on, notes pressed whilst the pedal is held down will be added to the Arpeggiator sequence.
Sequencer
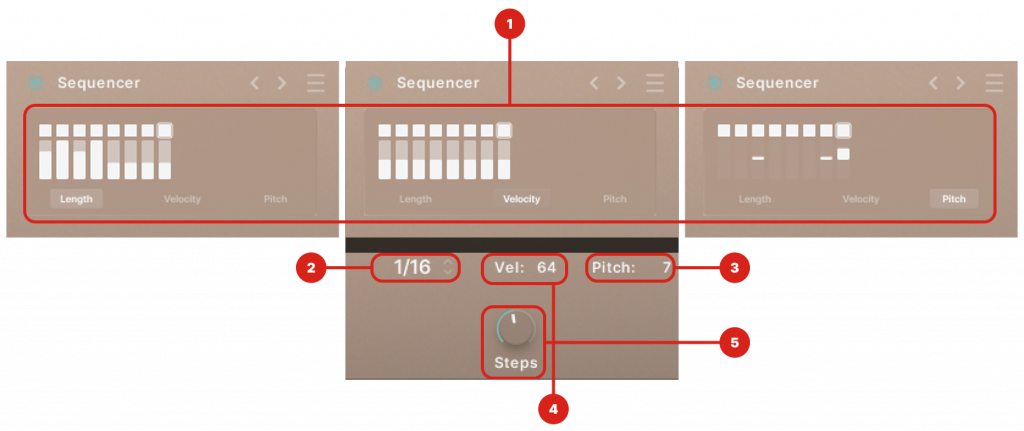
Sequencer Panels – Here you can see each step of your sequence displayed differently across the Length, Velocity, and Pitch pages. Each of these pages allow you to view and edit the displayed parameters. You can adjust each step within these panels, or via the controls below (2-5).
Length – Adjust the length of each step, from 1/4 to Triplet 1/32 notes. These update dynamically on the length panel.
Pitch – Click to adjust the pitch of each note in the sequence, from -12 to +12 semitones. These update dynamically on the pitch panel.
Velocity – Click to adjust the velocity of each note in the sequence, from 1 to 127.
Steps – Adjust the number of steps in your sequence from 1 to 16.
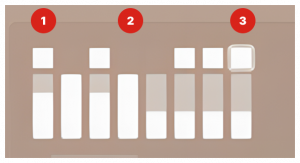
At the top of your sequencer you will find your Step Selector. This is used to toggle on and off certain steps within your sequence, or to create a break in the sequence for effect.
Rested Steps still have a length to them, so you will hear a silence for the allotted time given to your ‘rested step’. If you wish to remove a step, adjust the steps knob (5).
A solid square displays an active step
A missing square displays a skipped step
A highlighted square displays the current step
Doubling
Mode 1 – Subtly adjusts the timbre of the layer by triggering the sample above your selected note and pitching it down.
Mode 2 – Subtly adjusts the timbre of the layer by triggering the sample below your selected note and pitching it up
Con Sord
Activates or deacitves the Con Sordino emulation control. This emulates the addition of a mute on the selected instrument when active.
Stacking
Stacking Layer Count – The stacking control allows you to layer additional round robins on top of each other for a larger than life. When active, the layer count displays how many additional layers are being triggered.
Random – Adjusts the time between each additional stacking voice by up to 1000 ms.
Stereo – Adjusts where in the stereo field the layers can be randomly placed, with 180 degrees at 100% to mono at 0%.
Legato Smoothing
This control affects the length of the crossfade used on legato sound sources. A higher value corresponds to a longer transition.
Polyphonic Legato
This control allows you to assign how many simultaneous legato lines you can have triggered in that single particular layer. You can have up to 5 splits, with the velocity dividing equally over the number of splits you assign.
Keyboard Mapping
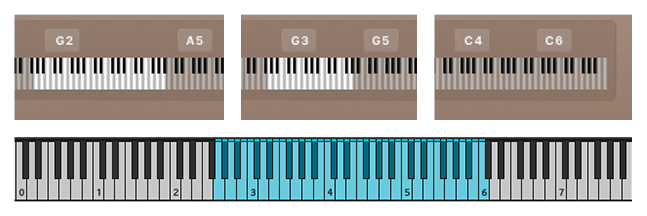
Across the Designer Interface, the range of your instrument is created by combining the ranges of all layers which are turned on. Each note of this key range will trigger all four layers of your instrument, even if your inputted note is outside the range of a particular layer.
In this instance, the closest note in the range of each layer will be automatically transposed up or down the instrument to align with your inputted note.
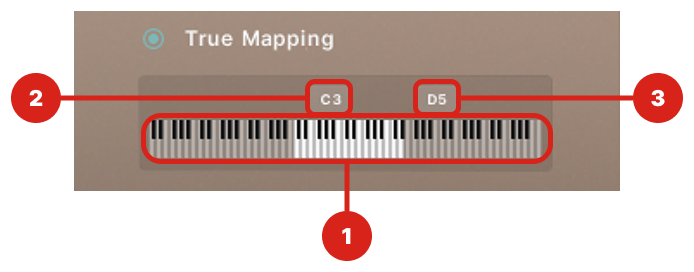
True Mapping
If you wish to represent the ‘true’ range of each layer, you can toggle on TrueMapping. This allows you to extend or truncate the range of each layer manually.
Key Range – With True Mapping on, this keyboard displays the playable range of your selected layer.
Low Keyboard Range – Defines the lowest key that this layer will trigger on.
High Keyboard Range – Defines the highest key that this layer will trigger on.
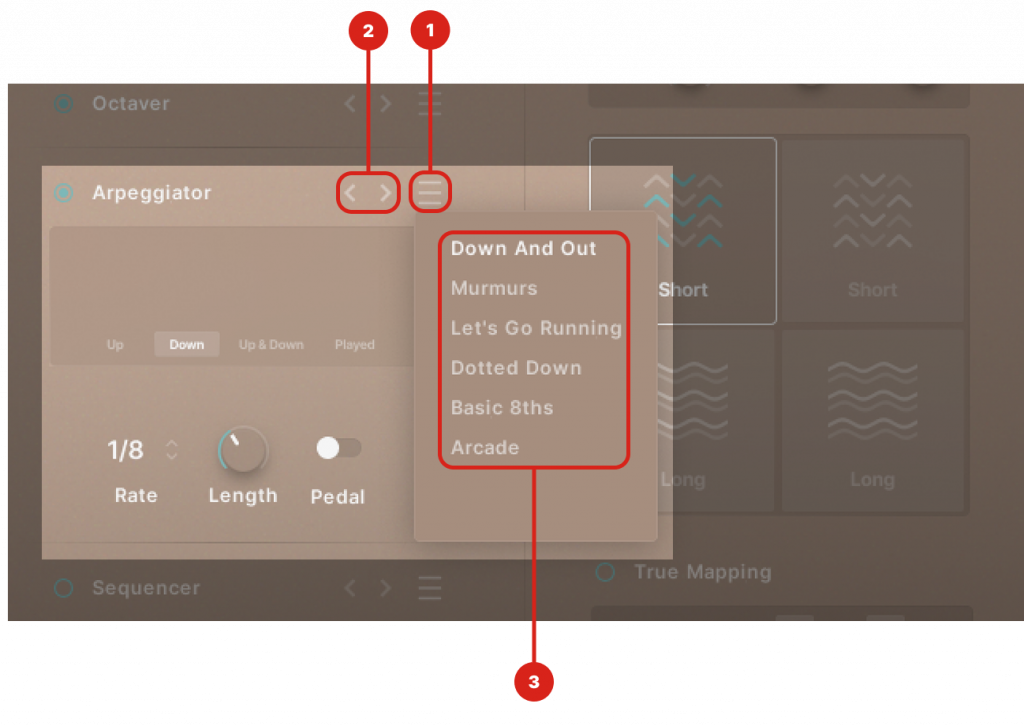
Layer Controls Preset Browser
Selected layer effects allow you to select from a number of factory presets to help you get started.
Layer Controls Preset Browser – Click to display all of the presets available for your selected layer control.
Effects Browser Navigation – Quickly select the previous and next preset without the need to open the Preset Browser.
Presets – Browse through and choose your desired preset.